
A useful Grok conversation rarely stays text-only. A research chat may contain links and generated images. A coding session can end with Markdown, HTML, or a downloadable file. A long brainstorming thread may contain only five messages worth keeping.
Copying that conversation into Notion by hand creates a second cleanup job. Message order gets blurred, code formatting breaks, images are separated from the answers that produced them, and bulk backup becomes a tab-by-tab routine.
Grok to Notion version 4.0.0 is designed around those problems. It can export the active conversation, let you review and select individual messages, or process multiple conversations from Grok history. Supported images and files are placed beside their source message in the resulting Notion page.
This guide covers the real version 4 workflow, including the optional permission used for protected Grok images.
What Grok to Notion exports
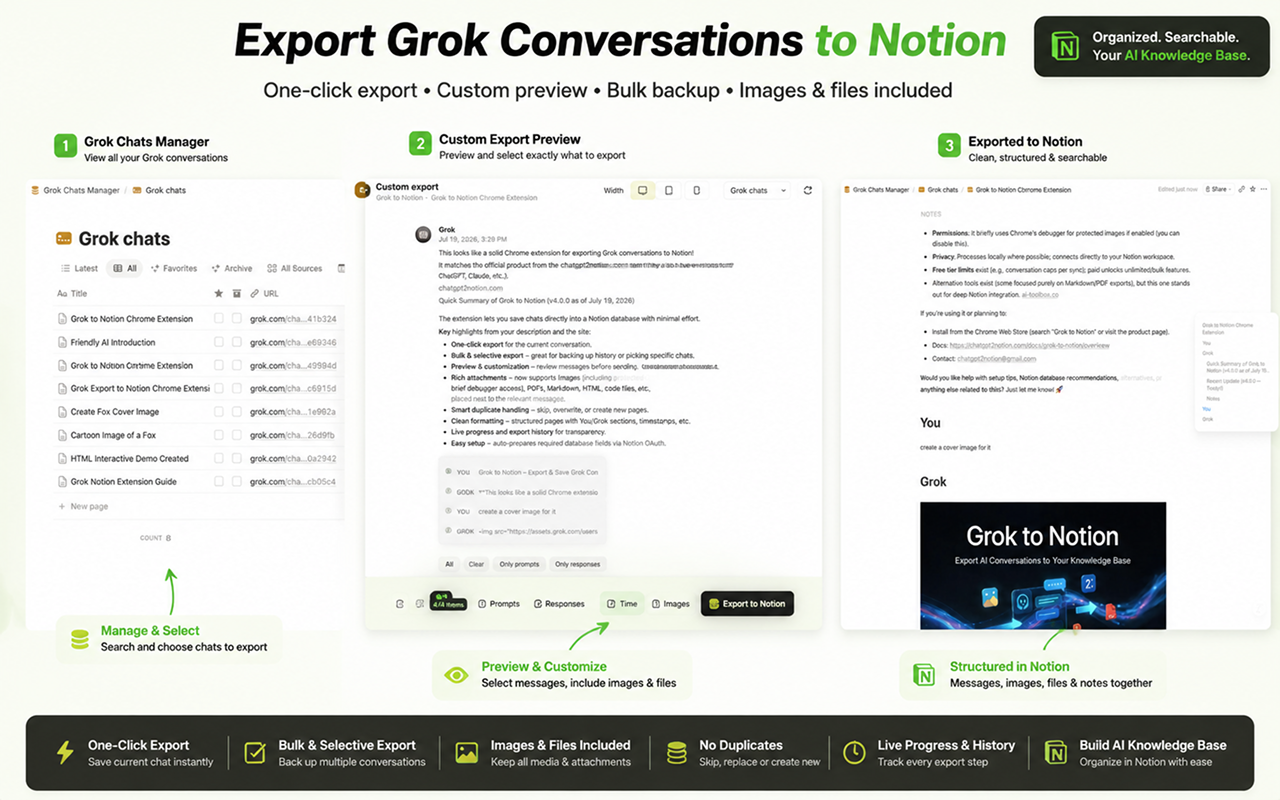
The extension converts a Grok conversation into a structured page inside a Notion database you authorize. An export can include:
- Prompts and Grok responses in their original order
- Conversation title, source URL, and timestamp
- Markdown formatting, headings, lists, tables, and code blocks
- Generated and uploaded images
- PDFs and regular file attachments
- Generated Markdown, HTML, and code files
Files use Notion’s native direct-upload flow. A single upload is limited to 20 MB by Notion. If one attachment cannot be uploaded, the exporter adds a warning at that attachment’s original position and continues with the rest of the conversation.
Install the extension and connect Notion
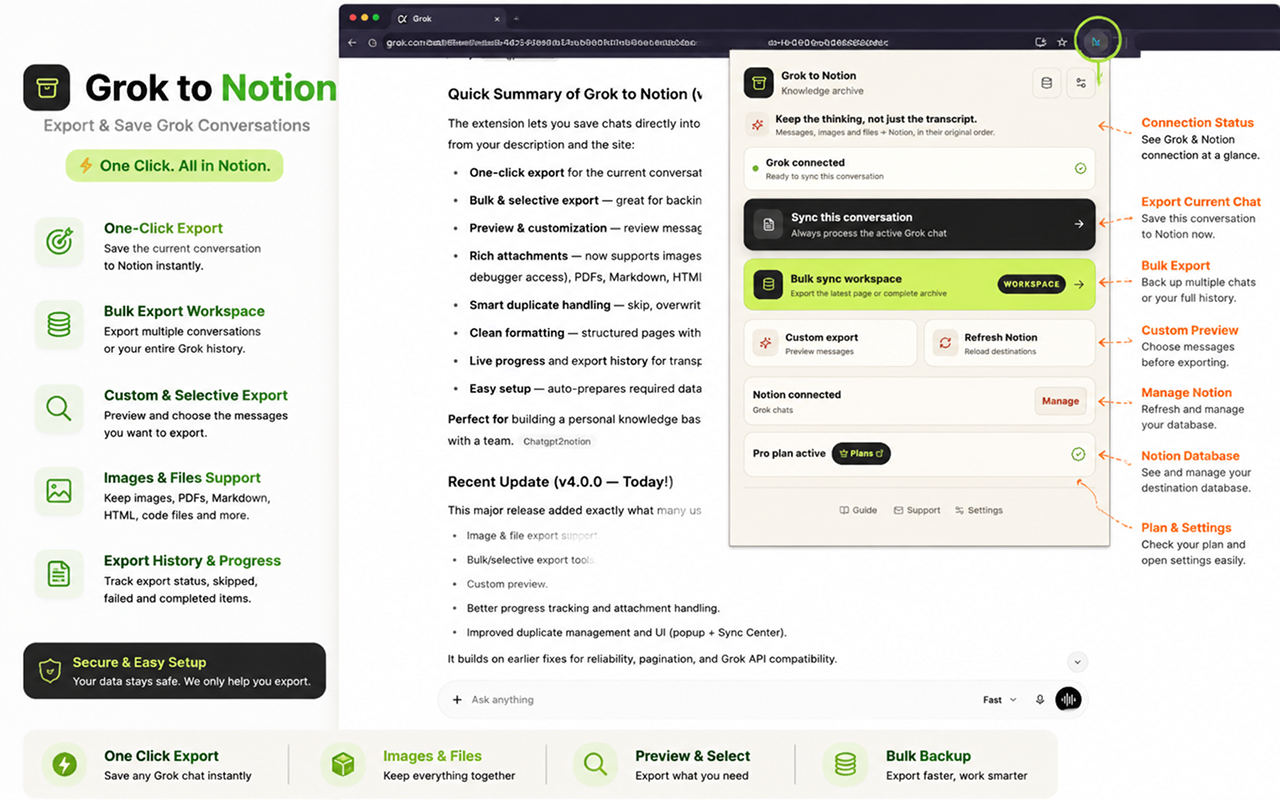
Install Grok to Notion from the Chrome Web Store, then pin it to the browser toolbar.
Open the extension and choose Connect to Notion. Notion will ask you to select a workspace and grant access to the page that will contain your export database. After authorization, return to the extension, refresh the destination list if needed, and select the database you want to use.
Keep a grok.com tab open. The extension reads your conversations through that tab, so closing or refreshing it can interrupt an export.
Export the conversation you are viewing
For one chat, the shortest workflow is:
- Open the conversation on
grok.com. - Click the Grok to Notion extension icon.
- Confirm that the popup shows Grok connected and the correct Notion destination.
- Choose Sync this conversation.
- Follow the progress state, then open the completed page in Notion.
The popup also links to bulk export, custom preview, Notion destination management, and quick export settings.
Export only selected messages from one chat
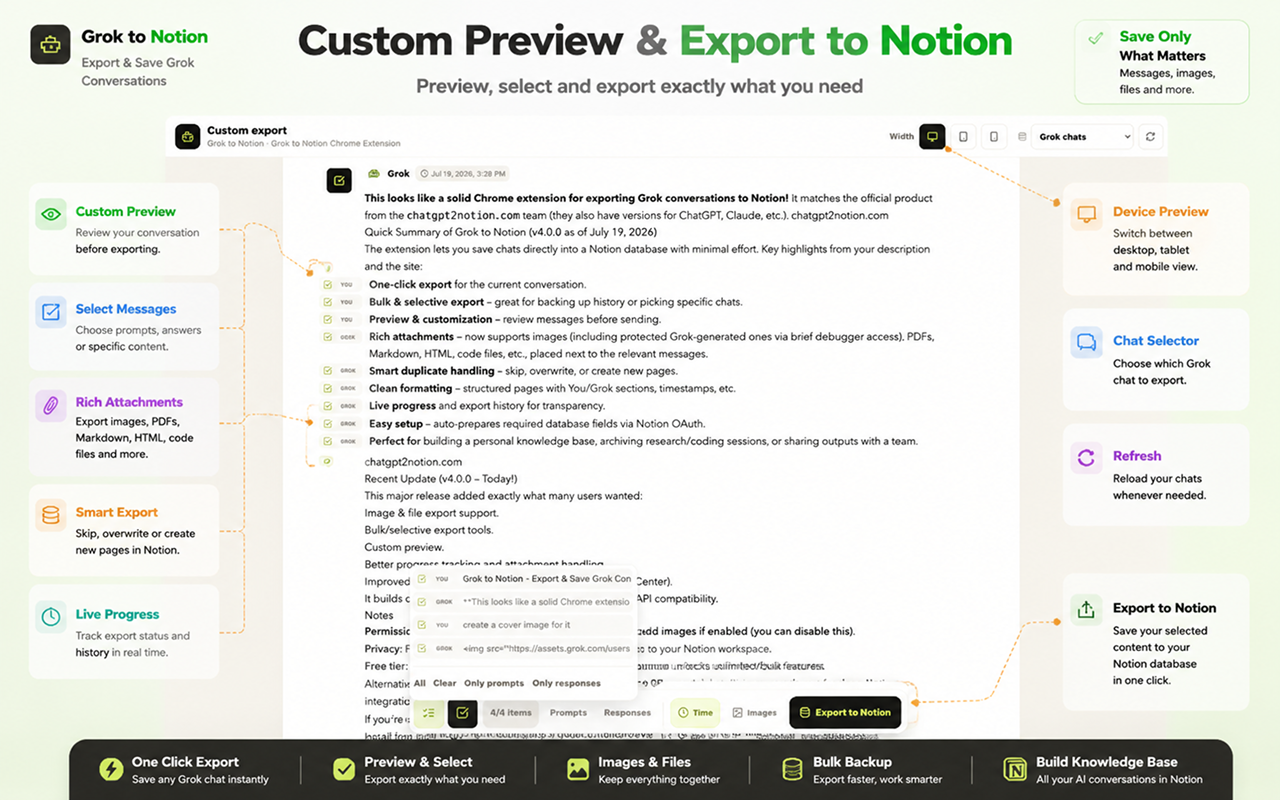
Use Custom export when a conversation is valuable but not every turn belongs in your knowledge base.
The full-page preview lets you:
- Select or clear individual messages
- Keep only prompts or only Grok responses
- Show or hide timestamps
- Switch between desktop, tablet, and mobile preview widths
- Choose another loaded Grok chat
- Toggle protected image export
- Select the Notion destination before exporting
This is useful for long research threads, iterative coding chats, or conversations containing several abandoned directions. The resulting Notion page contains only the messages selected in the preview.
Bulk export Grok history
Open Bulk sync workspace from the popup to enter Sync Center. Version 4 provides two working history modes.
Bulk mode offers two scopes:
- Current page processes the first 60 loaded conversations. It is the faster option for a regular backup.
- All history follows Grok’s pagination and progressively collects the complete available archive.
Selective mode loads a conversation list, supports title search, and lets you check only the chats you want. You can select the visible search results, load more conversations, or load all available pages before starting.
The Projects tab is visible in version 4.0.0 but marked as coming soon. It should not be treated as an available export mode yet.
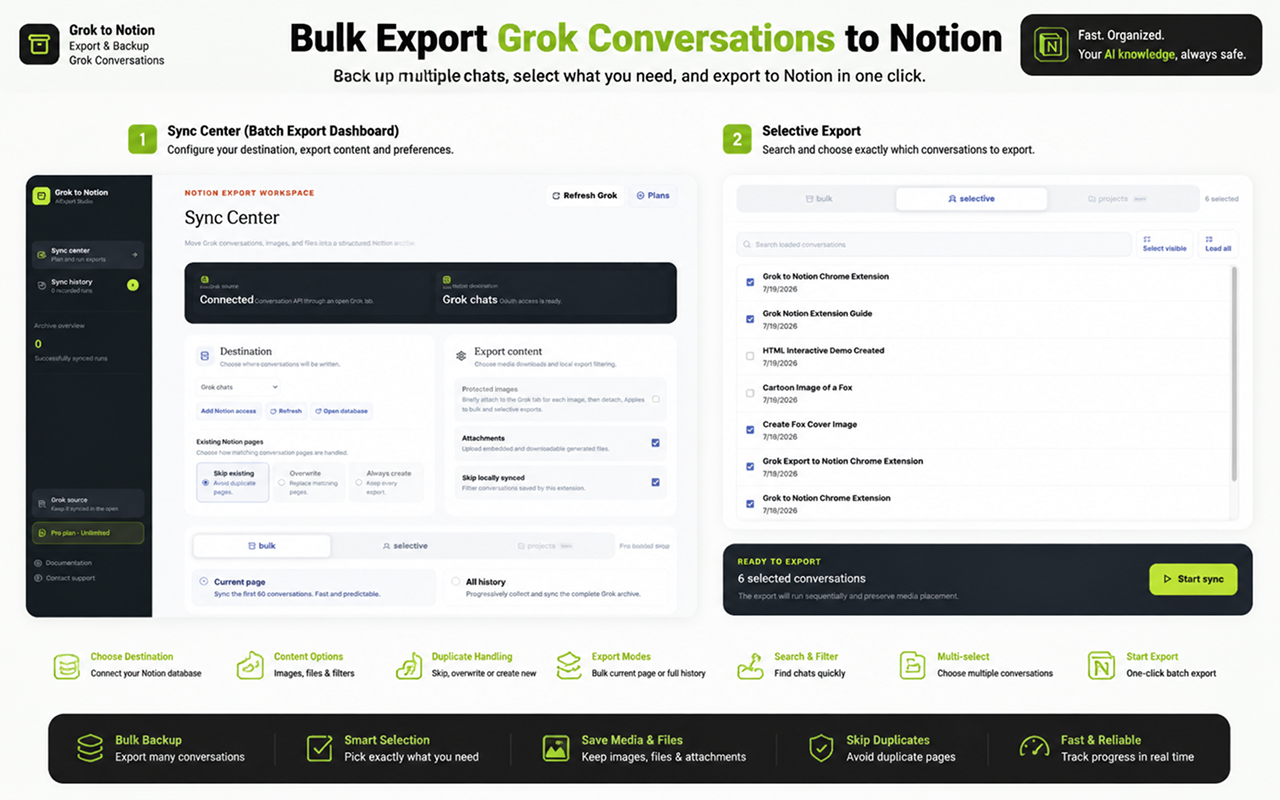
Choose how duplicates are handled
Before a bulk or selective run, choose the behavior for a conversation that already has a matching Notion page:
| Mode | What happens | Best for |
|---|---|---|
| Skip existing | Leaves the matching page unchanged | Recurring backups where Notion pages may contain manual edits |
| Overwrite | Replaces the matching page | Refreshing an archive with the latest Grok content |
| Always create | Creates a new page for every export | Keeping separate versions or snapshots |
The independent Skip locally synced option filters conversation IDs already recorded by the extension. It can reduce work before the exporter checks Notion, but clearing local history removes that local shortcut.
Export Grok images safely
Ordinary images and attachments can be downloaded through the browser. Some generated images on assets.grok.com are protected by Grok’s delivery rules and cannot be retrieved with a second normal network request.
For that reason, Protected images is off by default.
When you enable it, Chrome displays a confirmation explaining that the extension will briefly attach its debugger to an open Grok tab while copying each protected image. The extension limits capture to Grok image URLs, enforces the 20 MB size limit, and detaches after the capture attempt. You can leave the option disabled and export the rest of the conversation without protected images.
If a protected image is not captured, the exported Notion page receives a visible warning instead of silently keeping a broken external image.
Read the detailed permission explanation in Exporting Images and Files.
Monitor progress and verify the result
Large runs show the current conversation and media stage, including page creation, content processing, image retrieval, file upload, saved pages, skipped pages, and failures. Sync history records the result of completed bulk and selective runs.
After the export, open a few representative pages and verify:
- The title and source URL match the original conversation.
- Prompts and responses remain in the correct order.
- Code blocks, tables, and lists are readable.
- Images and files appear beside the message that produced them.
- Skipped, overwritten, or newly created pages match the selected conflict mode.
- A warning is visible for any media item that could not be uploaded.
For a reusable review process, use the AI Chat Backup Checklist.
Notion, Obsidian, or HTML—which exporter should you use?
Grok to Notion exports directly into a Notion database. It does not produce Obsidian Markdown or local HTML files.
If you want local files instead, use the separate Grok to Obsidian & HTML extension:
| Destination | Choose it when you need |
|---|---|
| Notion | Searchable databases, team access, tags, filters, and native file blocks |
| Obsidian | Local Markdown files inside a vault you control |
| HTML | A browser-readable local archive that opens without a note-taking app |
The destination matters because backup is not only about getting content out of Grok. It is about keeping the conversation usable after export. Notion is the strongest fit when you want the archive to become an organized, searchable knowledge base rather than a folder of static files.
Start with the Grok to Notion overview, or install the extension and test one representative conversation before running a complete history backup.