
Connect Notion and Select a Database
Authorize Perplexity to Notion with OAuth and prepare a compatible Notion database for v3.2 exports
Authorize the Notion Workspace
- Open the extension popup.
- Expand Notion Authorization.
- Click Connect to Notion.
- In Notion, choose the correct workspace and grant access to the page/database you want the integration to use.
- Wait for the redirect page to show that authorization succeeded.
- Return to Perplexity and reopen the popup.
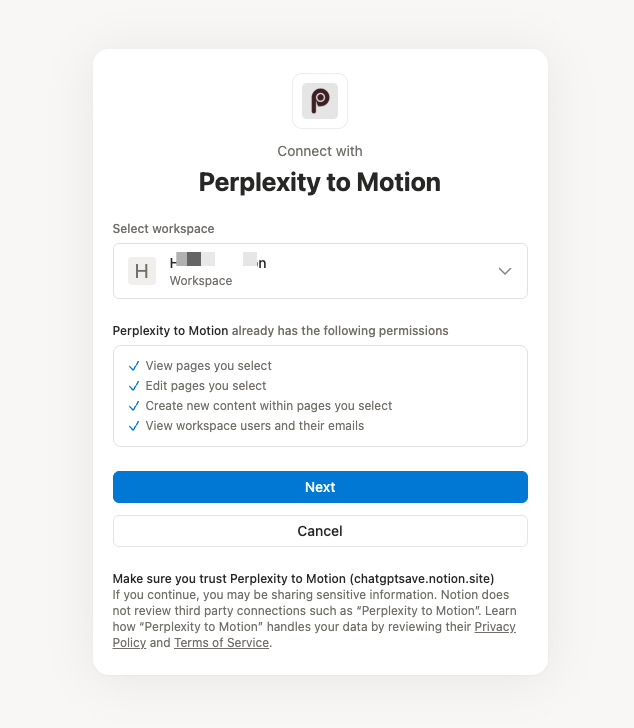
Choose the Notion workspace that contains the destination database.
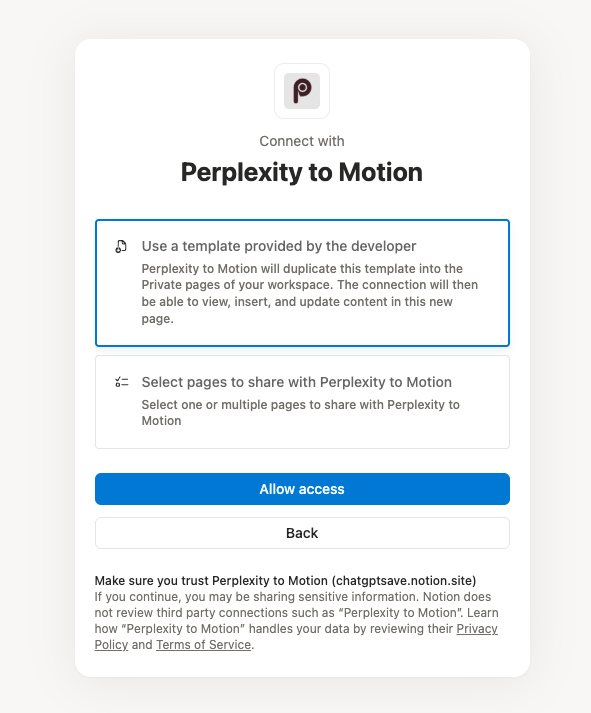
Grant access with the developer-provided template, or choose the pages to share with the integration.
The OAuth authorization code is exchanged through the product’s token service. The resulting Notion workspace connection is stored in Chrome and used by the extension to call the Notion API.
Select the Target Database
After authorization:
- Expand Notion Authorization in the popup or Notion Integration in Batch Export.
- Choose a database from Target Database.
- Use the refresh button to bypass the one-hour local database-list cache.
- Use the link button to open the selected database in Notion.
Only databases shared with the OAuth integration appear.
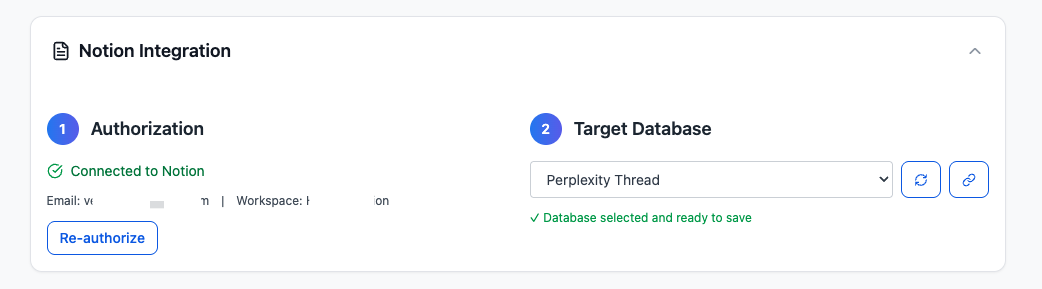
The Notion Integration card shows the connected state and selected target database.
Required Database Properties
The selected database must be compatible with the properties written by v3.2:
| Property | Type | When used |
|---|---|---|
title | Title | Every export |
URL | URL | Every export and URL-based duplicate matching |
Chat Time | Date | Every export when a source timestamp is available |
Space Name | Rich text | Space conversations; the extension attempts to add it |
Tags | Multi-select | Computer Tasks; the extension attempts to add it |
Use the provided Notion template when possible. A database whose title field is named Name instead of title, or whose URL/Chat Time type is different, can cause a Notion API validation error.
Re-authorize or Refresh
- Click Re-auth / Re-authorize if the token was revoked or the workspace changed.
- Click the database refresh icon after sharing a new database with the integration.
- Re-select the target database after re-authorizing if the stored selection is no longer available.
Security and Privacy Notes
- Conversation content is read from the signed-in Perplexity tab and sent to the selected Notion workspace by the extension.
- OAuth token exchange and subscription verification use product services.
- Configuration, exported IDs, failures, and history are cached in Chrome storage.
- Avoid using real customer or confidential research in documentation screenshots.
Troubleshooting
No databases appear
- Confirm that the database was shared during Notion authorization.
- Click refresh in the database selector.
- Re-authorize and grant access to the correct page/database.
Export reports a property error
- Compare the property names and types with the table above.
- Use a compatible template database.
- Confirm that you have permission to edit both the database schema and its pages.
Space Name or Tags could not be added
The export may continue with a warning, but Space or Task metadata can be missing. Grant schema-edit permission or add the compatible property manually.
Ready to try Perplexity To Notion?
Open the product page for feature details, screenshots, pricing, and the Chrome Web Store install link.